
January DIY Challenge | Wonderful | Eva Puig Tella
- epuigtel
- Jan 1, 2022
- 2 min read
It's Eva here wishing you a happy New Year full of new projects, LOVE and scrap, of course ;)
For the January Challenge we propose you a DIY challenge, you have to include a DIY item in your project, you can make whatever you want and if you don't know what to do, don't worry as you'll be inspired by all the talented design team girls. It's always a good day to learn a new technique, right?

As the host of the January Challenge I suggest you to learn how to make a cute snow hat using few materials and in a quick and easy way.
Are you exited? OK, let's start with a view of my January layout and at the end of the blog post I'll teach you to do it!! :)

I had a great time creating a lot of pretty embellishments with the https://www.bramblefox.co.uk/products?page=5 metal die set that now is on sale!!

Tiny gloves and lovely ice skates are all around the page! And the wonderful tittle add the perfect touch on it!

And what to say about the "FALALA" words also included in this set!

The strip of Christmas bulb lights is just awesome! You can use it with different colors or paper textures to add a new finish every time you want to use it.
You can see I also made some handstitching on the center of the embroidery.

Using the star stencil to add some details to the background is ALWAYS a good idea!

So here's the highlight again. Let's learn how to do it!
The first step is cut a strip of paper one finger wide and 3 inches long. These measurements always depend on the final size of your snowhat. In this layout my snow hat measure 1.5 inches wide and 2.5 inches tall.

Now it's time to glue the ends of the paper strip to make a hoop.

Then we have to cut 15-20 pieces of wool of 4 inches long.

Take them one by one and screw them to the paper hoop as when we add baker twine to a TAG.

At the end we will have something like this.

Now is the time to fix it up a bit. We tie a knot at the top to give it a snow hat shape.

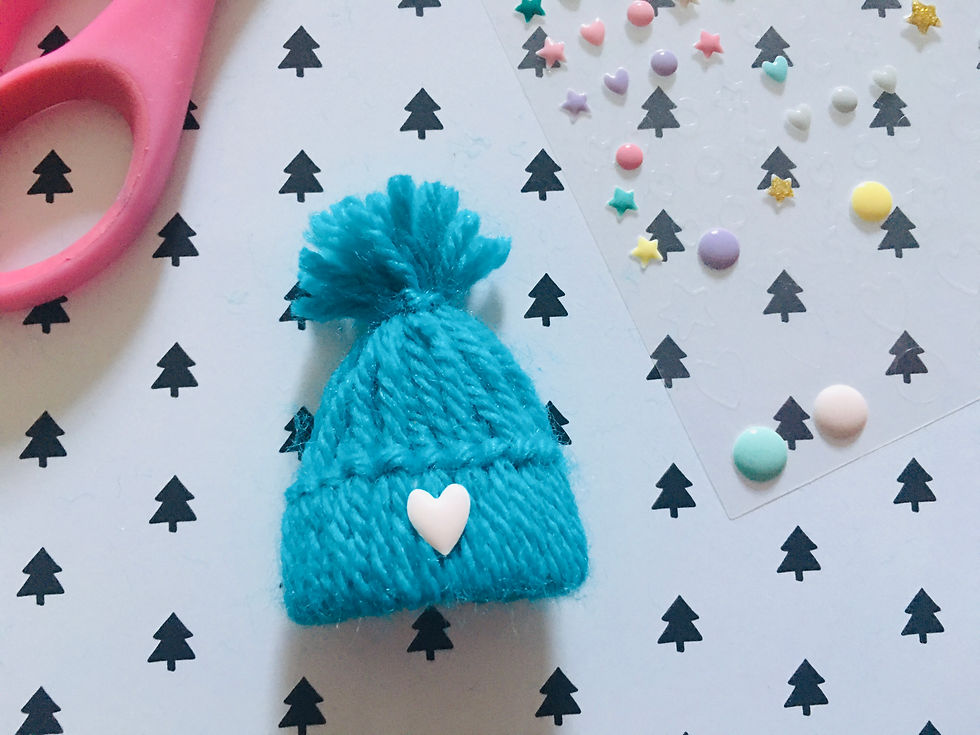
We have to cut the excess wool and we could leave it like this or we could cut the end shorter and add a small pom pom on it.

As the final touch you could add a little embellishment on it, in this case I decided to add a little enamel dot heart but you could add whatever you want as little sequins, buttons or make it using more than one color wool in the same snow hat!
Hope you like it and feel inspired to create your own snow hat!!
Can't wait to see all your DIY projects!!
Hugs.
Eva.


Comments