The Golden Gate Bridge Scrapbook Layout -Wendy Meffan
- wendymeffan
- Apr 18, 2025
- 2 min read
Travel perspextives are probably my favourite product from Bramble Fox! The new products for April do not disappoint and I am using the San Francisco set along with some Travel Elements, also with the Chevrons and Corners /Vintage set from previously. I am using a combination of Everywhere and Wherever Collections by 49 and Market.

I chose a background paper from the Everywhere Collection which had the world map across it which was ideal to show London to San Francisco. I used two mini geo tags and a plane from the Travel Elements to mark our journey. For extra effect I used a laser cut plane from the Wherever collection and stuck the perspextive plane over the top.

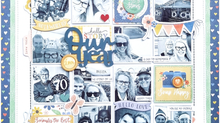
I had multiple photos to use and played around with their position until I was happy with them. I then matted them in strips and distressed the edges. Starting on the left side of the layout I created a background mat for the photos using acetate film pieces and journal cards. I then added embellishments from the laser cuts, chipboard and ephemera.

I had carefully worked out the spacing of my photos so that the large San Francisco perspextive would fit well along the photo edges. I adhered it and then added a few embellishments underneath it.

I then continued to add the strips of photos across the page and added the circular wooden etched San Francisco bridge piece at the base of the photo strips. I placed another acetate film strip towards the right and placed the last photos over the top of it. I tucked in some tickets and added the Chevrons and Corners/Vintage perspextives over the film strip. I like the balance of flat and raised embellishments to give more dimension to the layout.

From the bottom photo I worked my way up embellishing again with ephemera and laser cuts. I then added the outline parts of the Chevron perspextives vertically.
I used the Sizzix Framelets Fine Line Alpha Die by 49 and Market to cut out the Golden Gate Bridge Title letters. I then stuck them to a background paper to give them and edge. I fussy cut them and then placed them vertically down the right side of the layout to create a long vertical title. I felt both the colour and style offered balance to the layout.

I love how the layout turned out and that I was able to show so many of the bridge photos!
Do check out all the latest products over at www.bramblefox.co.uk to see all the new goodies!
Until next time ... Happy Scrapping!


Comments